Jun 26, 2026Guides
Thermal Transfer Printhead Maintenance – How to Clean and Protect Your Printer
Printhead deposits from ribbons and labels reduce print quality and lifespan. Follow this step-by-step guide to clean safely and keep your thermal transfer printer running.
Thermal Transfer Printhead Maintenance – How to Clean and Protect Your Printer
In a thermal transfer printer, the printhead presses the ribbon against the label and heats specific dots to transfer ink. Over time, residue from ribbon coating, label adhesive, and paper dust builds up on the ceramic printhead line. This causes faded barcodes, vertical lines, and eventually permanent damage.
Proper cleaning is simple, fast, and extends printhead life by 2–3 times. This guide explains when and how to clean, what products to use, and how to avoid common mistakes.
If you are new to thermal transfer printing, read our <u>introduction to thermal transfer ribbons</u> first.
1. Why Thermal Transfer Printheads Get Dirty
Unlike direct thermal printing (no ribbon), thermal transfer uses a ribbon that contains ink. During printing, tiny particles of wax, resin, or adhesive can transfer onto the printhead. Common contaminants:
- Ribbon coating residue – Especially with wax or wax/resin ribbons.
- Label adhesive bleed – Adhesive can squeeze out from label edges, especially with aggressive adhesives.
- Paper dust and fibres – From uncoated labels or cardboard.
- Static‑attracted dust – Common in dry environments.
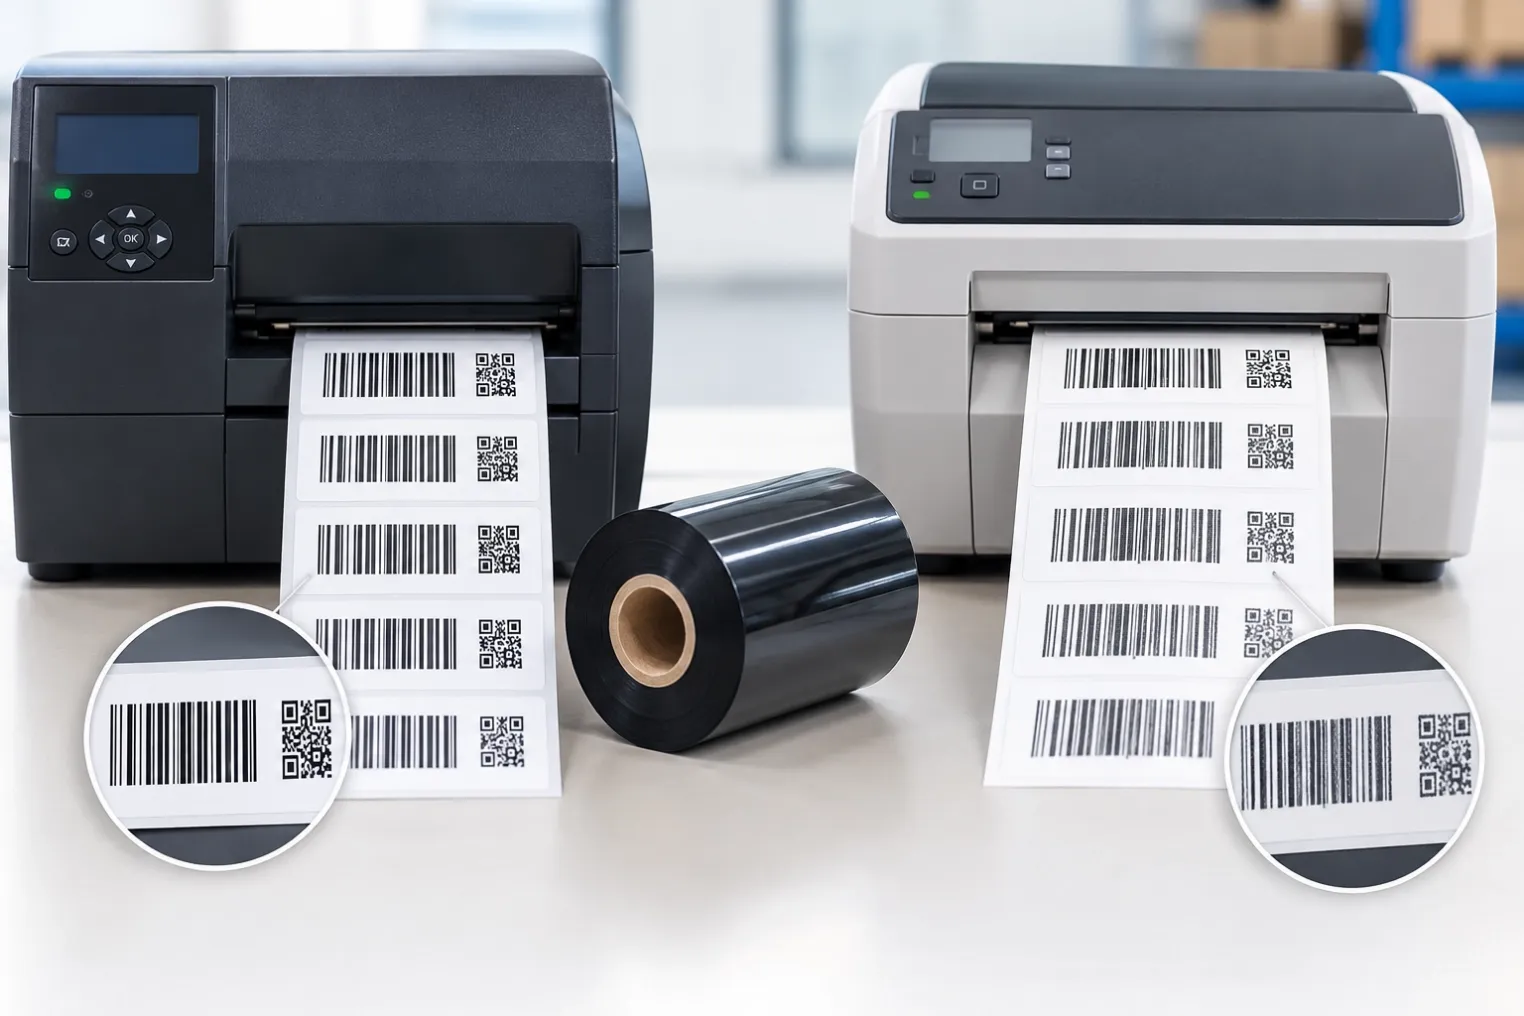
These deposits act as insulation, forcing the printhead to run hotter. The result: inconsistent print darkness, white lines (dead dots), and premature failure.
2. When to Clean Your Printhead
Follow these guidelines:
- After every ribbon roll change – minimum recommended frequency.
- When you see vertical white lines on printed labels.
- When print density becomes uneven across the label.
- When you change ribbon type (e.g., from wax to resin).
- When you switch to a different label material (e.g., from paper to PET).
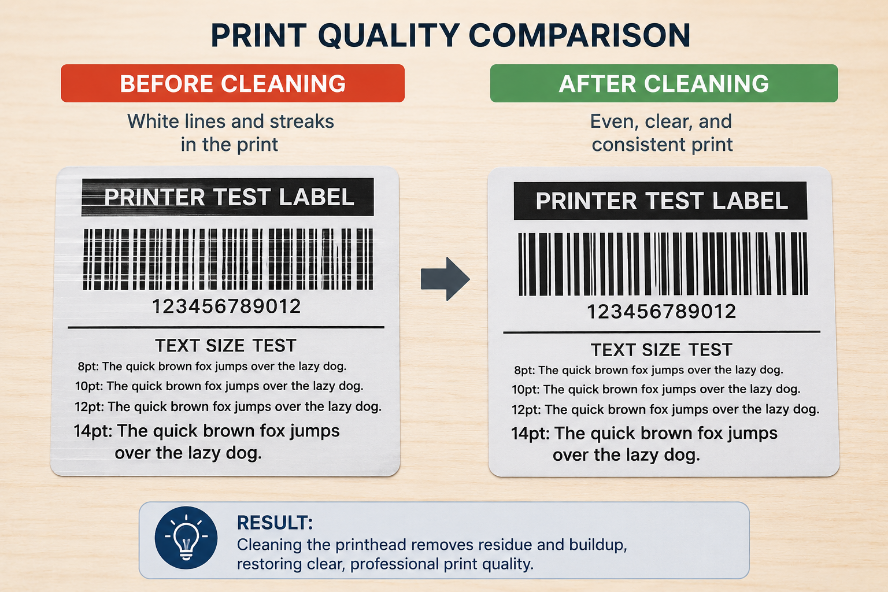
In high‑volume environments, clean once per shift or every 8 hours of printing.
Tip: Keep a log of cleaning dates and ribbon usage. Many printhead failures happen because cleaning was skipped.
3. What You Need for Safe Cleaning
Do not use household cleaning agents, acetone, or paper towels. They will destroy the protective coating.
Tool | Requirement |
|---|---|
Printhead cleaning pen | Pre‑saturated with ≥90% isopropyl alcohol (IPA), soft felt tip |
Lint‑free swabs | No loose fibres; larger than cotton buds |
Isopropyl alcohol (IPA) | 90% or higher concentration – evaporates quickly, leaves no residue |
Lint‑free cloth | For wiping external parts and platen roller |
Avoid: Cotton swabs (fibre shedding), IPA below 90% (water content causes corrosion), any abrasive pad.
We offer a <u>printhead cleaning kit</u> with all the correct tools.
4. Step‑by‑Step Cleaning Procedure
Always turn off the printer and unplug it before accessing the printhead. The printhead can be very hot immediately after printing – let it cool for 2–3 minutes.
- Open the printer cover and remove the ribbon and label roll.
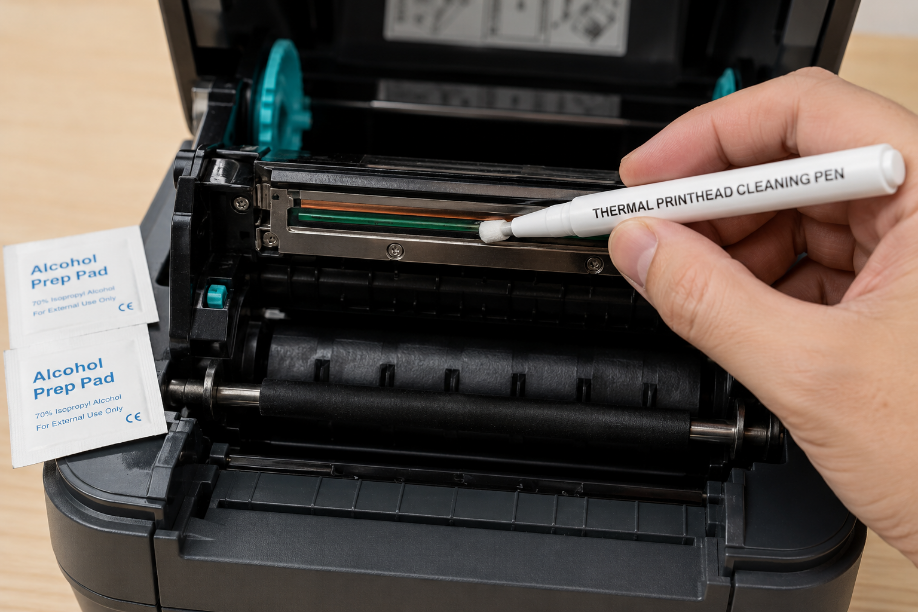
- Locate the printhead – usually a metal bar with a thin ceramic line. Refer to your printer manual if unsure.
- Take a cleaning pen or dip a lint‑free swab into IPA (not dripping wet).
- Gently wipe across the printhead from one end to the other, perpendicular to the heating line. Do not scrub back and forth.
- Wait 1–2 minutes for the IPA to evaporate completely.
- Clean the platen roller (the rubber roller below the printhead). Rotate it with your finger and wipe with a fresh swab or cloth.
- Remove any adhesive residue from label guides, sensors, and the ribbon take‑up spool.
- Close the printer, reload ribbon and labels, and print a test label.
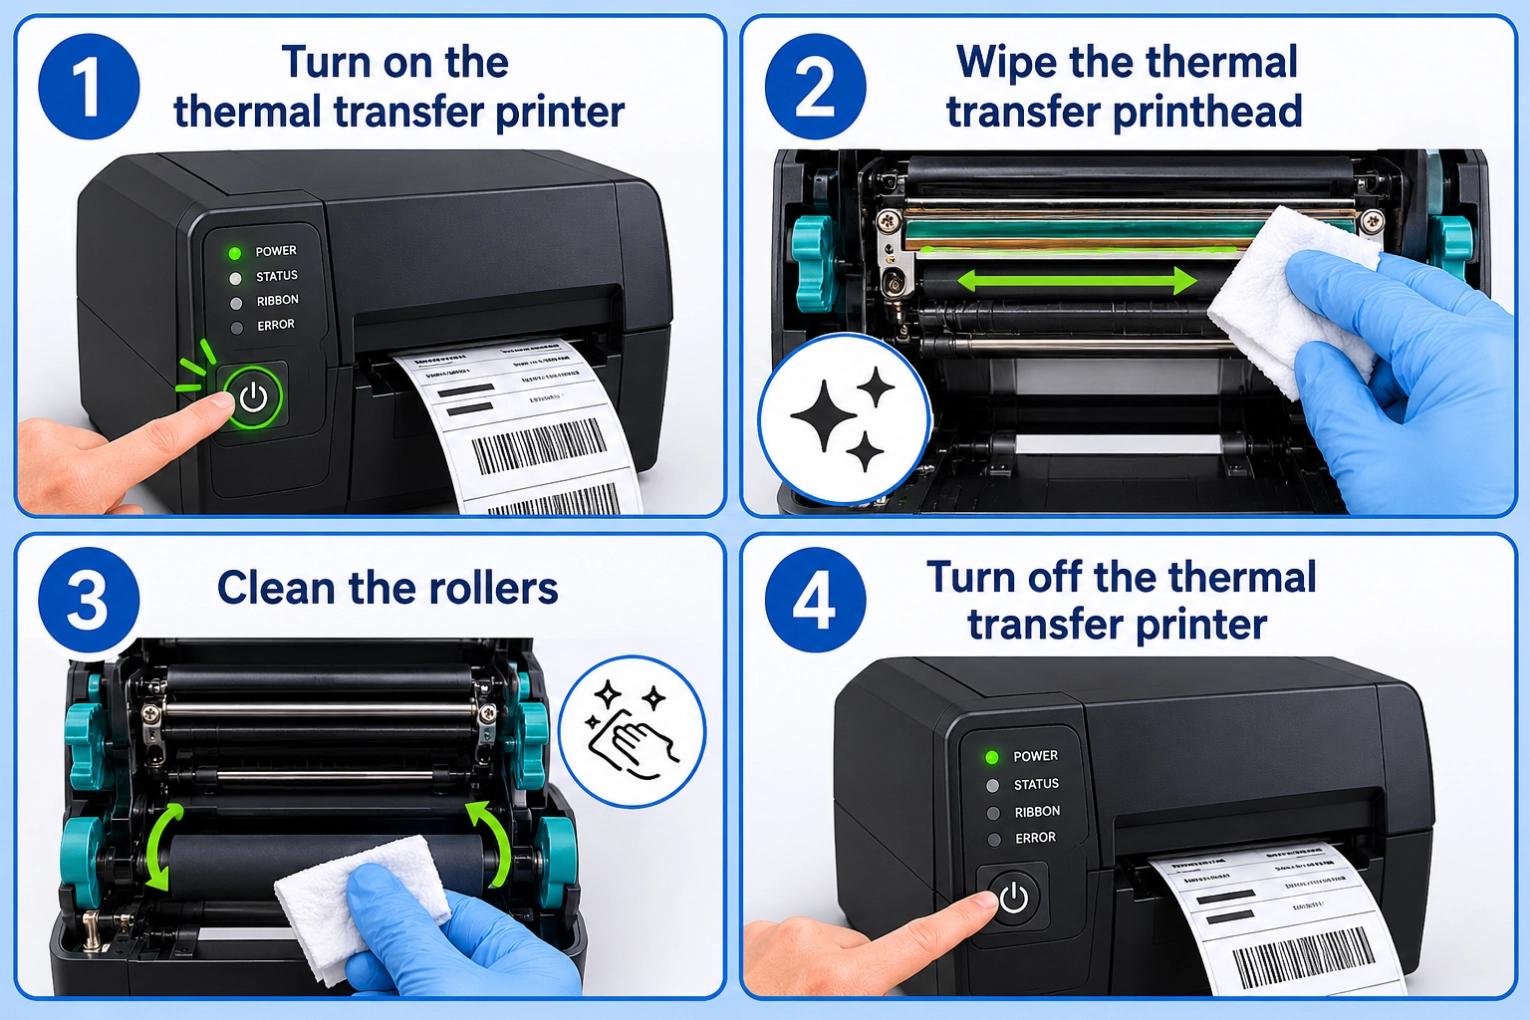
First test after cleaning: Print a small batch of labels and inspect for white lines or missing sections. If problems persist, the printhead may be damaged.
For visual guidance, watch our <u>video tutorial on printhead cleaning</u> (link).
5. Cleaning the Platen Roller – Often Overlooked
The platen roller (the rubber roller that feeds the label) accumulates adhesive and dirt. A dirty platen can:
- Transfer debris back to the printhead.
- Cause label slippage and skewed printing.
- Create uneven pressure, accelerating printhead wear.
How to clean: While the printer is open, rotate the platen roller with your finger and wipe it with a lint‑cloth moistened with IPA. Do not use sharp objects that could scratch the rubber.
Replace the platen roller if it becomes glazed, cracked, or has flat spots. See our <u>guide to platen roller replacement</u>.
6. Can Printer “Self‑Cleaning” Replace Manual Cleaning?
Many modern thermal transfer printers (Zebra, Honeywell, Sato) include a “self‑cleaning” or “printhead cleaning” routine that runs the ribbon at low temperature to burn off light residue. This is not a substitute for manual cleaning.
Use self‑cleaning between ribbon changes, but still perform a full manual clean every 3–5 ribbon rolls. Self‑cleaning does nothing for adhesive residue or paper dust.
7. Common Mistakes That Ruin Printheads
Mistake | Consequence |
|---|---|
Using acetone, thinner, or alcohol <90% | Strips protective coating, causes corrosion |
Scrubbing aggressively | Scratches ceramic, causing permanent white lines |
Cleaning while printhead is hot | Thermal shock cracks the ceramic |
Touching printhead with bare fingers | Skin oil creates hot spots and attracts debris |
Using cotton swabs | Fibres left behind, may burn onto printhead |
Not letting IPA dry before closing printer | Liquid can short electronics |
Avoid these and your printhead will last much longer.
8. How to Extend Printhead Life Between Cleanings
- Use high‑quality ribbons – Cheap ribbons have inconsistent coating and can be abrasive. Check our <u>ribbon quality guide</u>.
- Match ribbon width to label width – Ribbon should be 2–5mm wider than the label to prevent the printhead from contacting label adhesive.
- Set the lowest practical darkness – Higher darkness = more heat = faster wear. Adjust darkness just enough for good print quality.
- Keep the printer covered when not in use to prevent dust accumulation.
- Replace worn platen rollers – A worn roller increases friction and uneven pressure.
- Use the correct ribbon coating side – Outside vs inside coating matters; wrong orientation causes poor transfer and residue.
For printer‑specific settings, see our <u>compatibility database for Zebra, Honeywell, and Sato printers</u>.
9. When to Replace the Printhead
A thermal transfer printhead typically lasts 30–50 kilometers of printing (about 30–50 standard ribbon rolls). Replace it when:
- White lines remain after thorough cleaning – indicates burned‑out heating elements.
- The ceramic coating is visibly worn (dark line across the printhead).
- Print quality is consistently poor with multiple ribbons and labels.
Keep a spare printhead in stock if downtime is costly. We supply <u>genuine printheads for all major brands</u> – contact us with your printer model.
10. Conclusion & Next Steps
- Clean after every ribbon roll or at least weekly.
- Use ≥90% IPA and lint‑free swabs – never acetone or paper.
- Clean both the printhead and the platen roller.
- Replace printhead when white lines persist after cleaning.
Need a cleaning kit or a new printhead? Tell us your printer model, and we will recommend the right spare parts and supplies.