Sep 4, 2026Guides
Finding the Sweet Spot – Balancing Printer Speed and Darkness for Perfect Barcode Quality
Print speed and darkness work together – adjusting one affects the other. Learn how to find the optimal balance for crisp barcodes, longer printhead life, and fewer scanning errors.
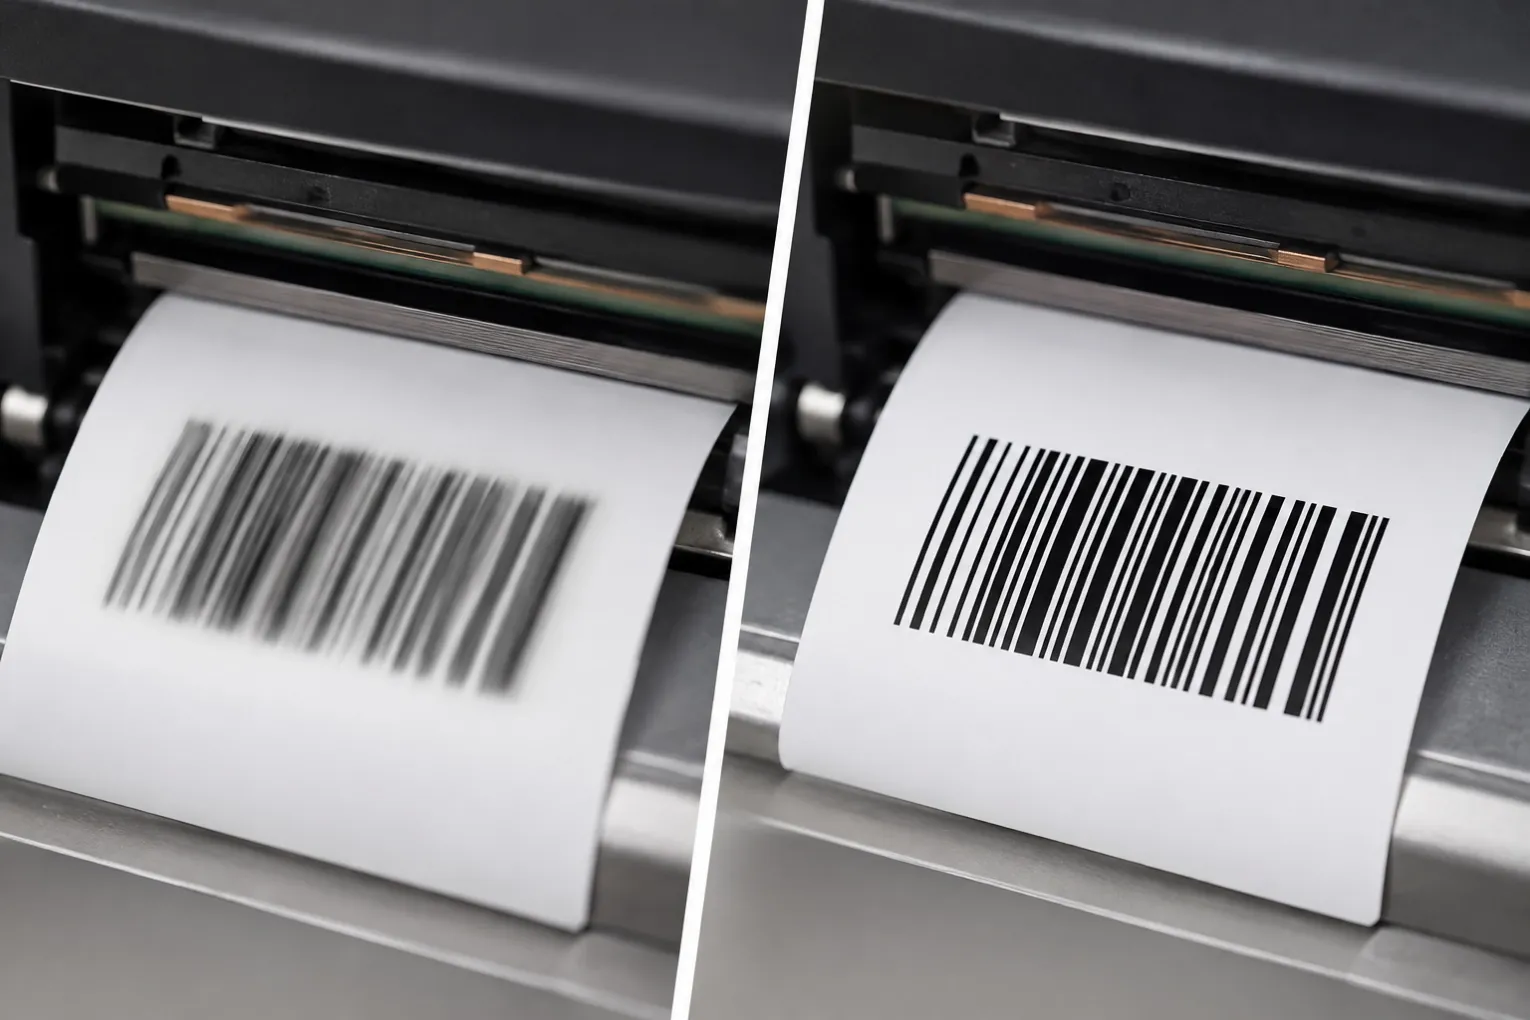
🖨️ You have set up your thermal transfer printer, loaded the correct ribbon and labels, and sent a test print. The barcode comes out faded, streaked, or patchy. So you crank up the darkness. It improves slightly, but now the print looks blurry around the edges. You slow down the speed – and suddenly everything is crisp and dark.
This is the fundamental balancing act of thermal transfer printing: speed and darkness are locked in an inverse relationship.
In this guide, I will explain how speed and darkness interact, how to find the optimal balance for your application, and how to avoid common mistakes that lead to faded barcodes, scanner rejections, and premature printhead wear.
1. What Do "Darkness" and "Speed" Actually Mean? 📋
Darkness (Heat / Density)
In thermal transfer printing, the printhead contains a row of tiny resistive heating elements. The "darkness" setting – often called heat, density, or intensity – controls the amount of electrical energy sent to these elements.
Setting | Effect |
|---|---|
Higher darkness | More heat – more ink melts, darker print |
Lower darkness | Less heat – less ink melts, lighter print |
Most printers have a darkness scale. Zebra printers typically use a 0–30 scale; some printers use 0–15 or 0–32. A setting of 1 is the coolest (lightest print), while the maximum is the hottest (darkest print).
Print Speed (IPS – Inches Per Second)
Print speed controls how fast the label moves past the printhead. Faster speeds mean higher throughput – but less time for heat to transfer.
Speed | Effect |
|---|---|
Faster | Higher throughput – less dwell time for heat transfer |
Slower | Lower throughput – more dwell time, better ink transfer |
💡 The key relationship: The faster the label moves, the less time each heating element has to transfer energy to the ribbon.
2. Why Speed and Darkness Are Inversely Related 🔄
In thermal transfer printing, print quality depends on the total energy delivered to the ribbon. This energy is a combination of:
- Power (controlled by darkness/heat)
- Time (controlled by print speed)
Think of it like cooking: you can use high heat for a short time, or low heat for a longer time. Both can achieve the same result – but only within certain limits.
The formula:
Variable | Relationship |
|---|---|
Delivered Energy | ≈ Darkness × Dwell Time |
Dwell Time | ∝ 1 ÷ Speed |
If speed increases (shorter dwell time), darkness must usually increase to maintain the same energy level. If speed decreases, darkness can be lowered.
In practice:
Change | Required Adjustment |
|---|---|
Increase speed by 20% | Often needs +1–2 darkness steps |
Decrease speed by 25% | May resolve fading without changing darkness |
Same speed, lower darkness | Lighter print |
Same speed, higher darkness | Darker print |
⚠️ Critical rule: Always validate settings with a barcode verifier, not by eye. The human eye is a poor judge of barcode quality – a label that looks "dark enough" may still fail a scanner.
3. The Problem with Too Much Darkness ❌
When barcodes are faded, the instinct is to crank the darkness to maximum. This is a mistake.
Problem | Why It Happens | Consequence |
|---|---|---|
Blooming | Excessive heat causes ink to bleed beyond the intended bar edges | Barcode quiet zones are filled – scanner cannot read |
Bar growth | Ink flows beyond the stroke boundaries | Bars become too wide, spaces too narrow |
Smudging / bleed | Over-energy causes trailing-end smudge | Print looks messy, barcodes fail verification |
Premature printhead wear | Higher darkness = more heat = faster degradation of heating elements | Printhead fails early – costly replacement |
Ribbon burn-through | Too much heat melts through the ribbon | Ribbon breaks, production stops |
The irony: Users who crank up darkness to "fix" faded prints often create new problems – and shorten printhead life in the process.
💡 Optimal print quality is achieved at the lowest possible heat setting that produces a crisp, solid black image. If you find yourself pushing darkness above 90%, you are compensating for a mismatched ribbon/label combination or a failing printhead – not fixing the problem.
4. The Problem with Too Much Speed ❌
Speed is the second pillar of thermal transfer printing. In high-volume environments, there is constant pressure to increase IPS. However:
Problem | Why It Happens | Consequence |
|---|---|---|
Incomplete transfer | Less dwell time – heat cannot fully melt the ribbon ink | Faded, "chattered" appearance |
Inconsistent fading | Printhead cannot maintain consistent temperature at high speed | Dark at the start of batch, lighter at the end |
Resin ribbon struggles | Resin requires more energy and longer dwell time than wax | Resin prints are especially prone to fading at high speed |
💡 Reducing your IPS by just 25% can often resolve fading issues without changing heat settings.
5. Finding the Sweet Spot – A Step-by-Step Approach 🎯
Step 1: Start with Manufacturer Recommendations
Printer Type | Starting Darkness | Starting Speed |
|---|---|---|
Industrial (Zebra, Honeywell, Sato) | 20–24 (on 0–30 scale) | 4–6 IPS |
Desktop printers | 15–20 | 2–4 IPS |
Resin ribbon on PET | 25–30 | 2–3 IPS |
Wax/resin on paper | 20–25 | 4–5 IPS |
Step 2: Print a Test Label
Print a label with a barcode, text, and solid black areas. Use your actual label material and ribbon.
Step 3: Assess the Print Quality
What You See | What It Means | What To Do |
|---|---|---|
Faded, light, or gray print | Not enough energy | Increase darkness OR decrease speed |
Blurry edges, bar growth, smudging | Too much energy | Decrease darkness OR increase speed |
Streaks or white lines | Dirty or damaged printhead | Clean printhead first |
Uneven darkness across label | Uneven printhead pressure | Check pressure toggles |
Step 4: Adjust Darkness First
Zebra recommends setting the darkness to the lowest setting that provides good print quality.
- Start at the manufacturer's recommended darkness
- Increase darkness in small increments (+1 or +2) until print is crisp and dark
- If you reach the upper range without good quality, slow down speed instead
Step 5: Adjust Speed Second
- If the print is still faded at moderate darkness, reduce speed by 10–25%
- If the print is smudging at moderate darkness, increase speed slightly
Step 6: Validate with a Barcode Verifier
The human eye is not reliable for barcode quality. Always validate with a barcode verifier to ensure:
- ANSI grade of A or B
- Correct quiet zones
- Proper bar/space ratios
6. How Ribbon and Label Material Affect the Balance 🧪
Material Combination | Recommended Approach |
|---|---|
Wax ribbon on paper | Lowest energy requirement – use lower darkness, higher speed |
Wax/resin on coated paper or matte PET | Moderate energy – balance darkness and speed |
Resin ribbon on PET, PI, or PP | Highest energy requirement – use higher darkness, lower speed |
Near-edge ribbon on TTO | Specialised formulation – follow manufacturer settings |
💡 Some materials require higher print darkness to produce a quality result. When increasing speed, raising darkness helps maintain sharpness.
7. Common Mistakes to Avoid ❌
Mistake | Consequence |
|---|---|
Cranking darkness to maximum to fix faded prints | Blooming, bar growth, premature printhead failure |
Increasing speed without adjusting darkness | Faded, unreadable barcodes |
Adjusting settings by eye only | Barcodes fail verification – scanners reject them |
Ignoring printhead cleanliness | Streaks, white lines – even with correct settings |
Not matching ribbon to label material | Poor transfer – darkness/speed cannot compensate |
Using the wrong ribbon type for printer | No transfer or poor quality |
Not running a printer self-test | Cannot isolate whether issue is hardware or settings |
✅ Always test with your actual labels, ribbon, and printer before full production.
8. Real-World Settings Reference 📊
Application | Recommended Darkness | Recommended Speed |
|---|---|---|
Paper labels + wax ribbon (warehouse) | 15–20 | 4–6 IPS |
Paper labels + wax/resin ribbon | 18–22 | 4–5 IPS |
PET labels + wax/resin ribbon | 20–25 | 3–4 IPS |
PET labels + resin ribbon | 25–30 | 2–3 IPS |
PI labels + resin ribbon | 28–35 | 1–3 IPS |
TTO / near-edge on flexible film | Follow manufacturer | Follow manufacturer |
💡 Zebra's guidance: Set the darkness to the lowest setting that provides good print quality. If set too high, labels may print unclearly, barcodes may not scan, ribbon may burn through, or printhead may wear prematurely.
9. Summary & Next Steps 🎯
- Darkness (heat) and speed are inversely related – adjusting one affects the other.
- Too much darkness causes blooming, bar growth, smudging, and printhead wear.
- Too much speed causes faded, incomplete transfer and inconsistent quality.
- Start with manufacturer recommendations, adjust darkness first, then speed.
- Always validate with a barcode verifier – not by eye.
- Clean your printhead regularly – dirt can mimic settings issues.
- Match your ribbon to your label material – the right combination makes balancing easier.
Need help finding the right settings for your printer? We offer technical support for all our ribbons and labels. Send us your printer model, label material, and current settings – we will help you find the optimal balance and send free samples for you to test.